Friday, 18 May 2012

Contrast and Exposure (12)

Requirement
Images in black and white and colour of high contrast scene, together with examples of different techniques to adjust contrast

Purpose        
To show basic technique in judging contrast of scenes and how to tackle exposure to achieve the results required

Technical learning
  • 2 ways of measuring light (a) brightness of subject (i.e. amount of light it reflects) and (b) the amount of light falling on the subject (incident reading of light)
  • Meters built into cameras only measure reflected light, whilst light meters measure both reflected and incident light
  •  All meters use the same principle when measuring reflected light: that is, they measure the average brightness of the scene
  • Neither pure black or white are as reliable as a standard as neutral grey (i.e. a surface reflects 18% of the light striking it)
  • Meters are set so that an average subject will appear as a mid tone (i.e. neutral grey)
  • This is only useful if the average is mid-tone, but otherwise not (e.g. the meter will treat a pure white wall as neutral grey)
  • Consequently, you must adjust exposure using TTL camera light meters for scenes that are over dark or over light
Tip for honing skill in judging contrast (Bruce Barnbaum, Art of Photography)
  • In everyday life (e.g. in a traffic jam) frame a scene in front of you
  • Identify the brightest and darkest spots within the frame
  • Review those elements of the scene that are highlights, mid tones and shadows
  • Consider the dynamic range of the scene and whether this lies within the camera’s capabilities
  • You will realise over time that you are training your eye to see scenes more intensely
  • Next speculate how the scene would change under different light (e.g. from afternoon to golden hour light or overcast to bright sunlight)
  • Decide what light might best suit the scene for the effect which you want

Exercise instructions

  • Find a scene with high contrast (i.e one that is likely to lie outside the dynamic range of your camera)
  • Use the search for this scene as practice in judging contrast (also see Tip above)
  • Look at the brightest part: what detail can you see?
  • Look at the darkest part: can you see detail there?
  • Measure the light in the brightest and darkest areas of the scene using the spot meter of your camera (else use a telephoto framed wholly on these areas)
  • How many stops difference are there between the brightest and darkest parts of the scene
  • Shoot the image at the average between the two exposure readings (both manual or matrix auto)
  • Create a colour as well as black and white version of the image
  • Explore ways in which to get a less lower contrast image

Images and Review

Micheldever Wood, Bluebells, May 2012

Exposure set for the darkest part of the scene
- the trunk of tree in the foreground
f16 @ 1/32, ISO 200

Exposure set for the brightest part of the scene
- sunlight in the background
f8 @ 1/16, ISO 200

The range is 4 stops between highlights and shadows in this scene


Matrix metered exposure
f8 @ 1/20, ISO 200
Too dark for desired result, 1.25 stop brighter than exposure for the darkest tones so 2.75 stops darker than exosure for the highlight


Blended version from matrix metered average
(2 versions created from adjustments in RAW)
and exposure for shadows

Another blended version using darkest, brightest
and average metered files and HDR Efex Pro


Saturday, 12 May 2012

Properties of light (11)


Requirement
None specifically

Purpose         

To consider some basic concepts of light important to landscape photography

Technical learning

The crucial element
  • Light has the single greatest impact on a landscape image
  • In considering light in the landscape, see it as a large outdoor set, with lights (the sun), reflectors (blue sky and clouds) and diffusers (clouds and, depending how reflective it is, the land, e.g. sand, snow vs grass fields)

Light and weather
  • Weather controls light and also determines the appearance of the sky. (Being able to predict weather conditions is a key skill for the landscape photographer.)
  •  Light changes constantly. The angle of the sun changes, so do the clouds and shadows and so on
  •  The landscape photographer must work with and use changing light. Patience is a virtue. Sometimes the most important decision is when to shoot (and when not to avoid becoming snap happy and losing focus)

5 types of light in 2D image (see also separate page)
  • Specular highlight - gives a mirror like reflection of the light source based on the positioning of the eye
  • Diffused light - shows the true texture and colour of a subject
  • Shaded side -  shows part of object sheltered from direct light
  • Reflected light – light reflected from the surface of another object
  • Shadow – absence of direct light surrounding object
  • First 4 types of light give information in the 2D of an image about the colour, texture and shape of an object. 
  • The fifth value (shadow) shows where an object lies in its surroundings as well as the shape and texture of these surroundings

Natural light in landscapes
  • Important to make mental separation between the physical elements and light
  • Natrual light has 4 variables: (a) sun’s position, (b) atmosphere, (c) weather and (d) surroundings    
  • Sun’s position in sky – depends on the time of day, season and latitude 
  • Atmosphere – softens light, especially when sun is low (i.e. light has to pass through more atmosphere), and scatters it (blue the most, hence the usual colour of a clear sky)
  •  Weather -  filters and reflects light in numerous ways (clouds, haze, fog, mist, dust, rain, snow, pollution)
  • Surroundings  - block light as well as reflect it

Colour of daylight (see Images below)
  • Human eye, unlike digital sensor, adjusts for colour differences in light with a bias towards ‘white’ daylight (chromatic adaptation)
  • Colour temperature, using the Kelvin scale,  describes the main colour differences of light, following what occurs when metal is heated
  • It is used (a) to identify filters to adjust colour or tones and/or (b) to adjust the white balance of a digital camera, say, to remove the orange colour of tungsten light.


Images and Review

Experiment in using Camera Raw Colour Temperature adjustment
  • Temperature control sets the image white balance to a custom colour temperature
  • Decrease the temperature (i.e. increase blue, reduce yellow) to correct a photo taken with a lower yellow biased colour of light, such as candelight (1930k) or domestic tungsten (2500K)
  • Conversely, increase temperature (i.e. increase yellow, reduce blue) to correct a photo taken with a higher bluer colour temperature of light, such as blue sky (10,000K),  shade under blue sky (7,500k), daylight deep shade (6500K) or overcast sky (6000K)
As shot in camera with digital
camera set to Auto White Balance
for a midday summer scene
with shadow in foreground and
sunlit middle and background
As adjusted in Camera Raw using
the highlight of metal rail in the foreground
to set the image's neutral grey. Reduces colour
temperature (increases yellow) by 650K


As adjusted in Camera Raw making
the maximum reduction in colour temperature.
Gives the image a yellow colour cast

As adjusted in Camera Raw making
the maximum increase in colour
temperature.
Gives the image a strong blue cast


Saturday, 5 May 2012

Assignment 1 - Seasons (Winter)

Requirement
12 photographs

Purpose         

To explore how the landscape changes across the seasons and how you react to these changes.

Exercise instructions

  • Consider light, colour, detail and the broader landscape
  • Shoot 12 images that convey your personal response to the season
  •  Repeat this assignment 3 times more, once in each season by visiting the same general location at least once during the season. 
  • Hold these additional photos until the end of the course. 
  • Then select 3 photos which best reflect the feel of each season. 
  • The aim is to end up with 12 images (3 x 4 seasons). 
  • This is in addition to project 15 (also to be included in the final portfolio (1 shot of the same scene x 4 seasons).
  • Evaluate the effectiveness of each shot in providing depth and drawing the eye into the frame.

Images and Review

Seasons 

Winter

Hard frost, 
Bushy Park
Eerie gathering in the fog, 
Bushy Park

Winter dawn, 
Bushy Park

Spring


Spring light and shadow,
Southbank, London (of all places)
Bluebell Wood,
Micheldever
Oilseed rape field
Chirton, Wiltshire

Summer


Poppy field
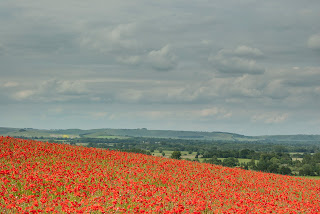
Upavon, Wiltshire
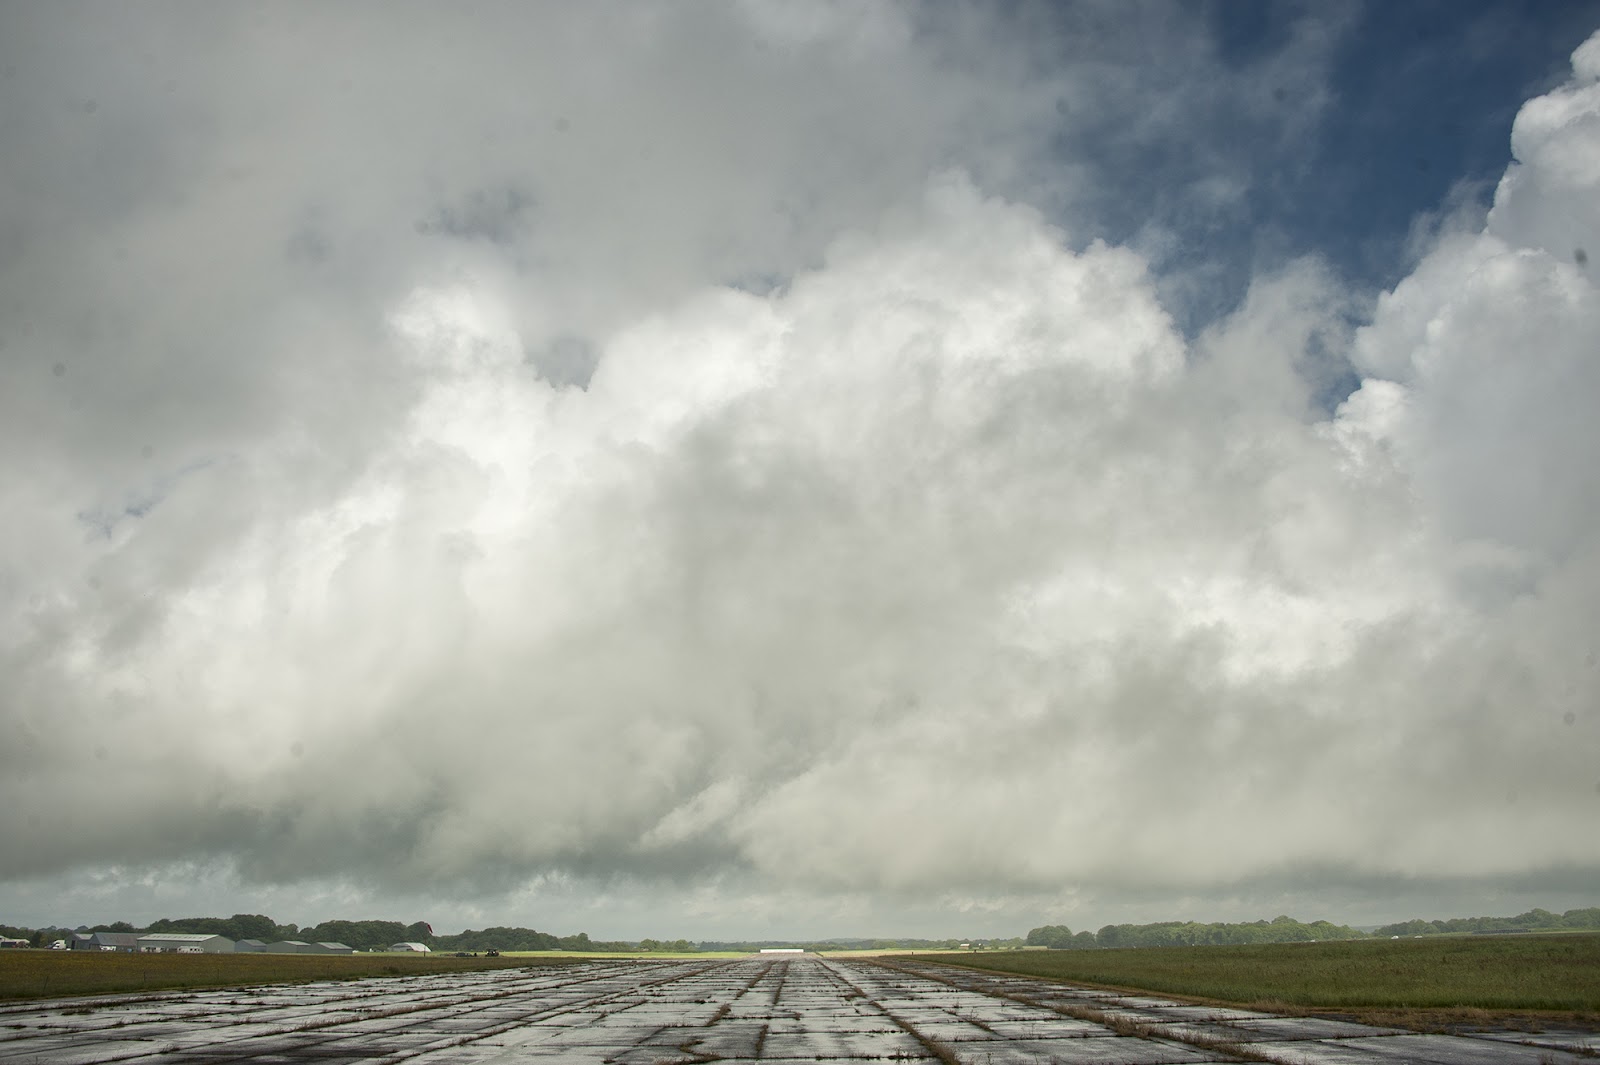
Summer rain
Dunkeswell Airport, Somerset
Camped on the beach
Sidmouth, Devon

Autumn


Dying and dead
Basingstoke Canal


Winter Assignment
This assignment was undertaken in 2 parts. Images 1 to 6 were taken in the winter of 2011/12, mostly in Bushy Park, Kingston-on-Thames. Images 7 to 12 were shot in Switzerland in the winter of 2009/10. 

The first 6 images show trees in the winter light and weather of southern England, the second 6 images the snow that dominates the Swiss winter. 

This division reflects my personal history of this course. I started when living in Switzerland, had to suspend it for a year, then returned to pick the threads in November 2011.


Tutor's conclusion (Jesse Alexander)
I instantly ‘get’ what [these pictures] are about (winter), but the reading is too instantaneous, and therefore empty.


A little bit of a step back from your first submission (Assignment 2) ... not in terms of image quality but in your confidence to articulate your own perspective. 

You could market these pictures successfully, but, with the exception of the shot of the tree and the girl, they have none of the critical, personal voice of that first body of work. 

I am sure this is down to you just losing your momentum a bit during deferral, so please don’t be put off by these remarks. 

By Level 2, we do hope that you will have technical competence, which you certainly have, to say the least, but stepping up and putting your point of view across in your work is
where we hope you will really be focusing on now.

My response

On reflection, I agree with your observation that, since the last assignment, whilst I have improved technically, I am going  backwards in developing personal style and voice.  It has taken me a few days to absorb this feedback.

Here's why I am advancing technically, but regressing in communication:
  • Personal voice comes from emotional connection with the subject. This connection comes with close contact. The landscape that surrounds me now, as opposed to my time in Switzerland,the M25 ring around London, the the UK's most congested urban environment.  Nearby 'landscape' is mostly managed space for mass recreation or to reduce the oppression for residents of bricks, tarmac, cement and cars. I can find plenty to say about that sort of landscape but this lies out of course scope.
  • So, making contact with in-scope landscape requires a decision where to go, time on the road to get there, confirming subject interest, abandoning the idea if no interest, visiting the location again if a prospect and waiting for light. This has to be found from a working life of  2.5 days of time spread over 4 days per week, and other personal commitments.
  • Furthermore, the course's projects are strongly technical exercises: find a scene with..., in such and such conditions ..., take x number of shots with your camera at these settings...tell us what you think. (Useful for technical improvement and I seem to be benefitting).
Still, not be defeated by this challenge, I am exploring for my next assignment the theme of water interacting with man-made structures within a 10 mile radius of home. I am taking as my inspiration for this the work of Toshio Shibata, on whose work I have posted a page on my blog. 

I will fill in the gaps in project work between assignments 1 and 3 as quickly as possible and write them up in sequence. However, I will spend less time on honing my technique by not re-doing the projects once results are 'good enough' for purpose.


1. A king of a tree, standing tall in the finery of its winter branches


Bushy Park 
Exception to comment about lack of individuality... a plain, English grey sky behind a cold, leafless oak tree in front of a smearing of snow – and most importantly, a modest yet powerful splash of colour which brings the scene to life, showing there is warmth amidst this bleakness. 


2. Trees seemingly drawing strength from infrequently bright winter sky


Woodland at Virginia Water Lake


3.  Trees emerging from the misty twilight of a winter dawn  

Bushy Park


Stunning ... shows dedication to shoot this place at such a perfect time of day.


4.  Trees enduring the frost and fog   

Bushy Park


5.  Tree decorating the still surface of its neighbouring stream

Bushy Park


6.  Tree drawing a crowd in the eerie gloom

Bushy Park

Wonderful atmosphere ... quite eerie


7.  Skiers take on the challenge of the high Alps  

Crap Sogn Gion above Flims (2,400 metres)

Calendar material for the Swiss tourist office?


8.  Sunset arrives at the out of season swimming pool

Lake Cauma


Good observation, but .... too preoccupied with the composition of the shot,
treating it as an almost abstract element  ... more interesting to see this within the
broader context of the landscape.


9.  Weekenders take the winter air at the local ice rink


Dolder ice rink
More Swiss tourist office calendar material?


10.  Forest lies silent after a blizzard 

Forest at Uetliberg


11.  Village church absorbs the winter sun


St Remigius Church, Falera
Postcard material?


12.  The water shines with the reflection of its surroundings


Lake Cauma

Postcard material?

Friday, 30 March 2012

Soft Colours (10)

Requirement
At least 3 photographs

Purpose         

To explore the impact on mood which using soft colours has in landscape images

Technical learning

  • Muted colours create their own mood
  • Fog or mist are nautral softeners of colour
  • Water as a reflective surface does the same
  • Location can provide a small range of colours,  e.g. autumn leaves, clay quarry


Exercise instructions

Shoot at least 3 scenes where the colour range is neutralised, i.e. the ranges of hues is so small that the image has a colour cast.  Each picture should be different. Do not use filters.

Images and Review


Road by the golf course in fog, Weybridge

Fog
The fog muted the colours of the trees, grass
and the road running through the course 


Seagull launches on semi-frozen lake, Bushy Park


Water reflection
The contrast between the gull and its reflection in
the lake shows how water tones down
colours. The overcast conditions
add to the effect.


Dawn at Sanxenxo, Galicia


Light
Early dawn light created a blue colour cast
over the sky, town and water

Saturday, 24 March 2012

Colour Themes (9)

Requirement
3 photographs

Purpose                      

To explore various relationships between natural colours in landscapes

Technical learning

  • Colour is always there in landscapes
  • Analysing any subject into the main parts of form and colour is an important ingredient in producing balanced images
  •  3 choices with colour (a) treat it as incidental, (b) work in black and white or (c) make it central
  • If you want to emphasise shapes, brightness, contrast or tones, then treat colour as incidental or, probably even more effective, work in monochrome 
  • If you want colour to create a strong physical and emotional response, make it central to your composition
  • 4 colour relationships to consider, each of which can yield an endless permutations
Monochromatic
  • Colours have the same hue but vary from dark (shade), medium to light (tint) values of brightness. 
  • Adds contrast
Analogous 
  • Colours lie next to each other in the colour wheel (e.g. yellow and red of similar tones). 
  • Pleasing, low contrast harmony
 Complementary 
  • Colours lie opposite to each other in the colour wheel (e.g. green with red, blue with orange, violet with yellow). 
  • Often, most effective to use a smaller amount of one of the colours as an accent. 
  • However, these colours have different brightness, from the darkest (violet) to the lightest (yellow). 
  • The relative brightness levels of these 6 colours are: yellow 9, orange 8, red 6, green 6, blue 4, violet 3. 
  • Consequently, perfect balance requires the following proportions of complementary colours (Red: Green – 1:1, Orange: Blue – 1:2; Yellow: Violet – 1:3)
  • Strong contrast - conveys energy, vigour, excitement. 
Split complementary
  • Consist of 3 colours, 2 one step either side of the complement’s analogous colours (e.g. red with blue-green with yellow-green). 
  • Low contrast beauty with contrast of the opposite colour, especially if this is used as an accent

Exercise instructions

Produce one good example of each of:
  • the largest range of greens in one view
  • the largest range of colour contrast
  • one isolated colour against a contrasting background.
How you frame the shot is important to the success of the image. All colours should be natural. The challenge is to find locations that fit the requirements of the project.

Images and Review

Evaluate the effectiveness of each shot.


Farm at Hirzel, Switzerland


Greens
Colour combination creates a pleasing harmony

between the various shades of green. The image also has 
contrasts between the textures of the farmland and lines
that engage the eye.


Egetswil, Switzerland


Colour contrast
Yellow of spring rapeseed blossom contrasts

with the blue of the sky and the green of the
background forest. 
Poppy in field, Wiltshire (near A303)


Isolated colour against contrasting background
Poppy gives a complementary colour accent to
the surrounding grasses. Cropped 2:1 to increase
the tension in the frame, forcing the eye to move
more energetically in the space